Determination of Aggregate Impact Value

The aggregate impact value is a measure of resistance to sudden impact or shock, which may differ from its resistance to gradually applied compressive load. Test procedure as per BS described below:- 

Sample Collection: The Standard aggregate should pass through 14.0 mm sieve and retain on a 10.0 mm sieve.

Apparatus: 

1) An AIV testing machine is showing below and consists of:


                Figure: AIV Testing Machine


* Weight should be 45-60 kg.

*  Machine shall have a circular  metal base weighing between 22-39 kg, with a plane lower surface of not less than 300 mm diameter and supported on a level and plane concrete or stone block or floor at least 450 mm thick.

* A cylindrical steel cup with an internal diameter of 102 mm and internal depth of 50 mm.

* A metal hammer weighing 13.5 kg to 14.0 kg of cylindrical shape.  

2) Test sieve of sizes 14.0 mm, 10.0 mm and 2.36 mm.

3) A cylindrical metal measures of sufficient rigidity to retain its form under rough usage and with an internal diameter of 75(+/-)1 mm and an internal depth of 50(+/-)1 mm.

4) A tamping rod of 10 mm diameter, 230 mm long, rounded at one end.

5) A balance of capacity not less than 500 gm and accurate to 0.1 gm.       

Test Procedure:

1) Rest the impact machine, upon the level plate, block or floor, so that it is rigid and the hammer guide columns are vertical.

2) Fix the cup firmly in position on the base of the machine and place the whole of the sample in it and compact by a single tamping of 25 strokes of the tamping rod.

3) Adjust the height of the hammer so that its lower face is 380(+/-)5 mm above the upper surface of the aggregates in the cup and then allow it to fall freely on the aggregates. Subject the test sample to a total of 15 such blows, each being delivered at an interval of not less than 1 second. No adjustment for hammer height is required after the first blow.

4) Then remove the crushed aggregates by holding the cup over a clean tray and hammering on the outside with a suitable rubber mallet until the sample particles are sufficiently disturbed to enable the mass of the sample to fall freely on the tray. Transfer fine particles adhering to the inside of the cup and the underside of the hammer to the tray by means of a stiff bristle brush. Sieve the whole of the sample in the tray, for the standard test, on the 2.36 mm (#8) test sieve until no further significant amount passes in 1 min.

5) Repeat the whole procedure starting from the beginning using a second sample of the same mass as the first sample.

Calculation:

1) The ratio of the mass of fines formed to the total sample mass in each test shall be expressed as a percentage, the result being recorded to the first decimal place.

        Percentage of the fraction passing the 2.36 mm (#8) sieve = ( B*100)/A

where, 
            A = weight of surface-dry sample.

            B = weight of fraction passing the 2.36 mm (#8) sieve

* the average of two determination is taken as the Aggregate Impact Value ( AIV)
  
Now Classification of aggregate using Aggregate Impact Value are as follows:     

 
Aggregate Impact Value
 
   Classification 
    <20%
   Exceptionally strong 
     10-20%   Strong
     20-30%   Satisfactory for road surfacing  
     >35%   Weak for road surfacing 

Importance Of Fineness Test of Cement:

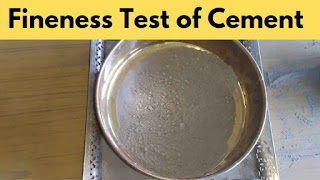
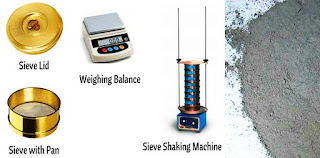
The property of cement that indicates particle size of cement and specific surface area is called fineness of cement. Rate of hydration greatly depend on fineness of cement and a for a rapid development of strength, high fineness is required.Here we can list the importance of cement fineness test:

1)  It affect hydration rate of cement and it turns into strength. Increasing fineness increase the rate of hydration, high strength and high heat generation.

2)  Bleeding can be reduced by increasing fineness.However increasing fineness demands more water for workability resulting a higher possibility of dry shrinkage. 

3)  The smaller the particle size the greater the surface area to volume ratio, thus the more area available for water -cement interaction per unit volume.

Importance of soundness test of cement

4)   It also used to check the proper grinding of cement and measure the surface area of the cement particles per unit mass.
Cement fineness test

Cement Test

The following tests are conduct in lab for Cement:-

1) Fineness test: The property of cement that indicates particle size of cement and specific surface area is called fineness of cement. Rate of hydration greatly depend on fineness of cement and a for a rapid development of strength, high fineness is required.
Cement test 

Cement test

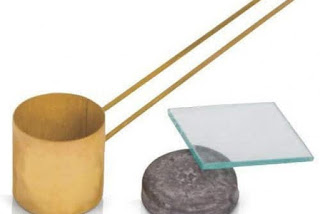
2) Soundness Test: It is essential for cement paste that once it has sets, does not undergo a large change in volume. The ability of cement to retains its volume after it get harder is known as soundness of cement. This test conduct to identify the excess amount of lime in cement.


Cement test
Cement test 


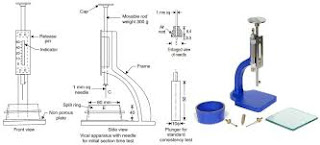
3) Consistency Test: The consistency at which cement paste will permit penetration on vicat plunger of 10 mm diameter and 50 mm length to a depth of 33-35 mm from top of the mould is defined as the standard consistency of cement. Generally, standard consistency for OPC is 26-33%.
Cement test 


Cement test


4) Setting Time Test: In broad sense setting refers to change of cement paste from a fluid state to a rigid state. Generally, Initial setting time and final setting time is required to test at lab.

Initial setting time is the state of cement mortar or concrete when it starts to become stiffen.
Final setting time is the state when cement mortar or concrete becomes fully unworkable.  
 For OPC initial setting time is 30 minutes and final setting time is 600 minutes.

5) Chemical composition Test:

6) Strength Test ( Compressive and..   Tensile): Cement has two types of strength: compressive strength and tensile strength . 
Two know the compressive strength  cement mortar cube test performed at lab.
And for tensile strength Briqutte test and split tensile test performed.

Field Test of Cement

Field Test of Cement 

Field Test of Cement: Cement is the most important ingradient for construction work. It plays vital role because it is the binding material. So ensuring good cement in construction work is important to know the field test of cement .
Cement test 
Here we will discuss about the the field test of cement:

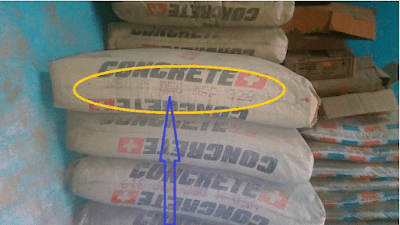
1) Manufacturing Date: As strength of cement reduced with time, so checking of manufacturing date is very important. 

   
Field test of cement
Cement Test 


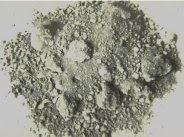
2) Colour of Cement: Colour of cement should be uniform and it would be light greenish gray.

You may Like: Field test of brick 

3) Presence of Hard Lump: Presence of lump in cement bag indicates the moisture absorption. So it should be free from lump.


Field test of cement
Cement Test 


4) Temperature: Temperature of cement in bag is very important. Normally if someone enter his hand in a cement bag it will feel cool. But if it feel worm, ( but new cement from the manufacturing will be warm) then it indicate that hydration reaction start there, which is not desired.  
Cement test 

You may Like: Field test of Sand 

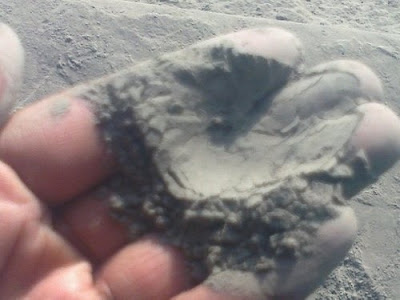
5) Smoothness: When cement rubbed with two fingers it will feel smooth. Rough in feelings indicate adulteration.


Field test of cement
Cement Test 


6) Water Sinking:  If a small quantity of cement thrown on water in-case of good quality cement it will sink.

7) Flexure Test: Make a 25 mm * 25 mm * 200 mm block if cement with water. Then immersed in water for 03 days. After removing, it is supported 150 mm apart and a weight of 15 kg uniformly placed over it. If it shows no sign of failure, the cement is good.       
Cement Test 

Performing these field test you can confirm good quality cement at your construction field.


Water Absorption test of Bricks

Absorption Test of Bricks as per ASTM C67:

Apparatus: 

1) Balance:  It should have a capacity of not less than 2000 gm and shall be sensitive to 0.5 gm.

2) Oven:  Drying oven have a capacity of maintaining a temperature between 110 and 115 degree Celsius.

Test Specimens:

The test specimens shall consists of half bricks. 05 specimens will be tested.

Test Procedure:

* Drying: Dry the test specimens in oven at 110-115 degree Celsius for not less than 24 hours.
*Cooling : After drying cool it at a temperature 24( +/-) 8 degree Celsius with a relative humidity between 30%-70%.
* After drying and cooling weight the specimens by the balance.
* After that submerged the dry cooled specimens in clean water at 15.5-30 degree Celsius for specified time(here 24 hours).            After that remove the specimen and wipe off the surface with a damp cloth and weight the specimen. Complete weighting of each specimen within 05 minutes after removing the specimen from water.

Calculation:

Calculate the absorption of each specimen as follows:

                    Absorption, % = { (Ws-Wd) / Wd } *100

        here, Ws = saturated weight of the specimen after submerged in water

                Wd = Dry weight of specimen


নির্মাণ কাজের উপযোগী ভালো বালু চেনার উপায়

আপনার নির্মাণকাজে ব্যবহৃত প্রতিটি জিনিস ভালো কিনা তা অবশ্যই জেনে নেয়া ভাল। নির্মাণ কাজের অন্যতম অপরিহার্য উপাদান বালু। আজ আমরা জানব কিভাবে বালুর কিছু ফিল্ড টেস্টের মাধ্যমে তা ভালো কি মন্দ তা জানা যায়।

১) প্রথমে চোখের দেখায় আমরা ভালো বালি চেনার চেষ্টা করব। ভালো বালুতে কোন ফরেন ম্যাটেরিয়াল মিশ্রিত থাকবে না। অর্থাৎ এটা ময়লা / আগাছা মুক্ত হবে।


২) এবার অল্প সংখ্যক বালু হাতের তালুতে নিয়ে বৃদ্ধাঙ্গুল দিয়ে ভালো ভাবে ডলা দেয়ার পর ফেলে দিতে হবে। বালুতে কাদা থাকলে তা হাতের তালুতে লেগে থাকবে।

৩) অল্প কয়েক দানা বালু জিহ্বায় দিয়ে এতে লবনের উপস্হিতি আছে কিনা তা বুঝা যায়।

৪) একটি পরিষ্কার কাঁচের পাত্রের ১/৪ ভাগ বালু নিয়ে তাতে অবশিষ্ট ৩/৪ ভাগ পানি নিতে হব।   এবার এই মিশ্রণ ভালোভাবে নেড়ে একটা সমতল জায়গায় রেখে দিতে হবে।
রাখার কয়েক সেকেন্ডের মধ্যেই বালু নিচে জমা হবে। এখন পরবর্তী ২ ঘন্টায় মধ্যে বালুর উপরে যা জমা হবে তাই বালুতে মিশে থাকা ভেজাল। 

মনে রাখা ভাল বালুতে এইসব মিশে থাকা কাঁদা -পলি ৫% এর বেশি হওয়া ঠিক না। আর নির্মাণ কাজে ব্যবহৃত বালু অবশ্যই লবন মুক্ত হতে হবে।                    

ভালো সিমেন্ট চেনার উপায়

সিমেন্ট, নির্মাণ কাজের সবচেয়ে গুরুত্বপূর্ণ উপাদান।  ঢালাইয়ের কাজে ঢালাইয়ের উপাদানগুলো জমাট বাঁধতে বর্তমানে সিমেন্টের ব্যবহার প্রায় অপ্রতিদ্বন্দ্বী। 
টেকনিক্যাল লোকজন ল্যাব টেস্ট করে সিমেন্টের গুণাবলি জানতে পারবে কিন্তু যারা ল্যাব টেস্ট করতে পারবে না তাদের জন্য???? 
হ্যা তাদের জন্য কিছু ফিল্ড টেস্ট আছ। যার দ্বারা সিমেন্টের ভালো মন্দ সহজেই সবাই চিনতে পারবে।  এই টেস্টগুলো হলোঃ

১) সিমেন্টের ব্যাগের মুখ খুলে ভেতরে জমাটবদ্ধ সিমেন্ট থাকলে তা ভালো সিমেন্ট নয়। ভালো সিমেন্ট কখনো জমাটবদ্ধ থাকবে না।      

২) একটা সিমেন্টের ব্যাগে হাত ঢুকালে ভালো সিমেন্টের ক্ষেত্রে ঠান্ডা অনুভব হবে।

৩) অল্প সিমেন্ট হাতের দুই আঙ্গুলে নিলে ভালো সিমেন্টের 
ক্ষেত্রে মসৃণ অনুভব হবে।   

৪) এক মুঠো সিমেন্ট হাতে নিয়ে মুঠো করে হাত পানির ভেতরে প্রবেশ করালে যখন মুঠোর ভেতরে পানি ঢুকবে তখন ভালো সিমেন্টের ক্ষেত্রে গরম অনুভব হবে।

৫) একমুঠো সিমেন্ট হাতে নিয়ে তা পানিতে ছড়িয়ে দিলে ভালো সিমেন্ট সাথে সাথে পানিতে ঢুবে যাবে কিন্তু সিমেন্ট ভালো না হলে তা পানির উপরে ভেষে থাকবে।

    এই বিষয়গুলো লক্ষ্য করলেই আপনি সহজেই আপনার নির্মাণকাজে ভালো সিমেন্টের উপস্থিতি নিশ্চিত করতে পারবেন।        


Test on Bricks

Bricks are widely used in different kind of construction site all over the world. So we need to know about its tests to ensure good quality bricks in construction. Following tests are performed to ensure its quality:

1.Compressive Strength of Bricks: 
According to BDS-208, take 12 bricks randomly from sample and half them and take one-half for test. The specimens shall be immersed in water at 15- 20 degree Celsius for 24 hours . After that dry them at room temperature for 5 minutes.Fill their frogs by mortar of 1:1.5  cement-sand ratio.The bricks should now stored under damp sack for 24 hours and after that it should immersed in water for 6 days before performing test.After 7 days of filling mortar, specimens will be taken out, wiped dry with damp cloth and placed with flat surface horizontally, and the mortar filled face facing upward between two number 3 plywood sheets each approximately of 3 mm thickness and carefully centered between the plates of the compression testing machine.The compression plate of the testing machine shall have a ball seating in the form of a portion of sphere, the center of each coinciding with the center of the face of the plate. The load shall be applied axially at a uniform rate of 140kg/sqcm per minute until the failure. The failure shall be deemed to have occurred when no further increase in the load is registered with unchanged rate of moving head travel. 

        Compressive strength (kg/sqcm or mpa or lb/sqin)= W/A
            Where,
                        W= Maximum load indicated by machine
                        A= Area.
       
2. Water Absorption test of Bricks: To ensure good quality brick determining water absorption is very important. This test conducted to determine durability properties of bricks i.e. degree of burning, quality and behavior of bricks under weathering actions. Click here to know about this test procedure.

3. Efflorescence : Efflorescence is a whitish crystalline deposit on surface of the bricks. Usually it is the deposit of salt on brick. If soluble salt present in clay during brick molding then it causes efflorescence. 
  
4. Measurement of Size: 

5. Determining the Weight of Brick:

6.Measurement of Warpage.

CBR Test (সিবিআর টেস্ট)

CBR টেস্টের মাধ্যমে মূলত মাটির shear strength সমন্ধে ধারণা পাওয়া যায়। এটা মূলত ল্যাবরেটরী টেস্ট তবে অনেক সময় সাইটেও এই টেষ্ট করা যায় এবং এর রেজাল্ট থেকে সহজেই  রাস্তার বিভিন্ন লেয়ারের প্রয়োজনীয় পুরুত্ব নির্ণয় করা যায়।           
 এই টেস্টের সবচেয়ে বড় সুবিধা হচ্ছে এই টেস্ট  গোটা বিশ্বজুড়ে ব্যাপকভাবে ব্যবহৃত হয়, ফলে টেস্ট থেকে প্রাপ্ত রেজাল্ট সহজে বুঝার জন্য অনেক গাইডলাইন সহজেই পাওয়া যায়।


যন্ত্রপাতিঃ 
১) সিবিআর লোডিং মেশিনঃ এটা কম্প্রেশন মেশিন, যা  ৪৪.৫ কিলোনিউটন লোড ১.২৭ মিলিমিটার প্রতিমিনিটে প্রয়োগ করতে পারে।


২) প্রোভিং রিং যা প্রযুক্ত লোড পরিমাপে সমর্। 

৩) পেনিট্রেশন পিস্টন

৪) পেনিট্রেশন পরিমাপের জন্য ডায়াল গজ

৫)  মোল্ডঃ সিলিন্ডার সেইপের যার ভেতরের ডায়ামিটার হবে ১৫২.২+/- ০.৬৬  মিলি. ও উচ্চতা হবে ১৭৭.৮ +/- ০.৬৬ মিলিমিটার।


৬) স্পেসার ডিস্কঃ মেটালের তৈরি গোলাকার ডিস্ক যার ডায়ামিটার ১৫০.৮ +/- ০.৮ মিলিমিটার ও উচ্চতা ৬১.৪ +/-০.১ মিলিমিটার। 
৭) র‍্যামারঃ  ভর ২.৫ কেজি (৫.৫ পাউন্ড) ও আঘাত করার ফেস হবে ৫০.৮ মিলিমিটার ডায়ামিটারের।

৮) এক্সপানসন  পরিমাপের জন্য প্রয়োজনীয় যন্ত্রপাতি
৯) সারচার্জ ভর 
১০) ট্যাঙ্কঃ স্যাম্পলের ২৫ মিলিমিটার  উপর পর্যন্ত পানির লেভেল মেইনটেইন করার মত ট্যাঙ্ক
১১) ব্যালান্স
১২) ওভেন
১৩) সীভঃ ১৯ মিলিমিটার ও ৪ নং
 
স্যাম্পলঃ 
৩৫ কেজি স্যাম্পল AASHTO (Method-C) অনুযায়ী নিন্মলিখিত ভাবে তৈরি করতে হবেঃ

- যদি ফিল্ড থেকে সংগৃহীত স্যাম্পল ভেজা হয় তবে তা ওভেনে শুকিয়ে নিতে হবে ( তবে লক্ষ্য রাখতে হবে তাপমাত্রা যেন ৬০ ডিগ্রি অতিক্রম না করে)      

 -ম্যাটেরিয়াল যদি ১৯ মিলি. সীভ দিয়ে সবগুলোই পাস করে তবে সেগুলোই কাজে লাগবে আর যদি কিছু সংখ্যক ম্যাটেরিয়াল ১৯ মিলি. সীভের উপরে থেকে যায়,তাহলে সে পরিমান ম্যাটেরিয়াল যা ১৯ মিলিমিটারে পাস করে কিন্তু ৪ নং এর উপরে থাকে  এমন ম্যাটেরিয়াল দ্বারা রিপ্লেস করতে হবে।

- ১১ কেজির মত স্যাম্পল MDD/ OMC জন্য আলাদা করতে হবে এবং বাকীগুলো ৩ ভাগে ভাগ করতে হবে।

নমুনা প্রস্তুতিঃ
১) নরমালি ৩ টি কম্পাকটেড নমুনা প্রস্তুত করতে হবে, যেন তাদের কম্পাকটেড ডেনসিটি MDD'র ৯৫-১০০% হয়।

* OMC ও MDD  নির্ণয়ের জন্য স্ট্যান্ডার্ড প্রক্টোর বা মডিফাইড প্রক্টোর কম্পাকশন মেথড ব্যবহার করা যায়। 

* সাধারণত নমুনা ৩ টি প্রস্তুতির জন্য প্রতি লেয়ারে ১০, ৩০ ও ৬৫ ব্লো এর প্রয়োজন হয়।

২) মোল্ডের ক্লাম্পকে বেস প্লেটের সাথে আটকিয়ে এর ওজন নেয়া হয়। এরপর একটি স্পেসার ডিস্ক মোল্ডে লাগিয়ে তার উপরে একটি ফিল্টার পেপার যোগ করা হয়।

৩) এবার পূর্বের আলাদাকৃত ৩ টি স্যাম্পলে Optimum moisture content obtain করার জন্য নির্দিষ্ট পরিমান পানি মেশানো হয়।

৪)  এরপর মোল্ডে পানি মেশানো স্যাম্পল নিয়ে কম্পাক করা হয় এবং মোল্ডে এর উচ্চতা ১২৭ মিলিমিটার করা হয়।    স্ট্যান্ডার্ড টেস্টের জন্য ০৩ লেয়ারে ও মডিফাইড টেস্টের জন্য ০৫ লেয়ারে কম্পাক করা হয়।

*কম্পাকশনের প্রথমে ও শেষে স্যাম্পলের ময়েশ্চার কনটেন্ট নির্ণয় করতে হবে।

৫) এবার ক্লাম্প খুলে মোল্ডকে আলাদা করে এর সারফেস সমান করে ট্রিম করে নিয়ে তার ওজন নির্ণয় করতে হবে।

সোকিং ( soak CBR নির্ণয়ের ক্ষেত্র):

 ১) এক্ষেত্রে নমুনার উপর annular load দিয়ে পানিতে ডুবিয়ে রাখতে হবে ৯৬ ঘন্টা। এসময় সোকিং ট্যাঙ্কে পানির লেভেল 
এমনভাবে রাখতে হবে যেন তা নমুনার ২৫ মিলি উপর পর্যন্ত থাকে। 
২) ৯৬ ঘন্টা পর soak specimen এর ফাইনাল ডায়াল রিডিং নিয়ে swell এর পার্সেন্টেজ নির্ণয় করতে হবে নিন্মলিখিত ভাবেঃ

swell(%)= [(change in dial reading)÷( depth of compacted specimen)] ×100


পেনিট্রেশন টেস্টঃ

১) এই ধাপে নমুনার উপরে সারচার্জ দিতে হবে। এই সারচার্জের পরিমাপ হবে সোকিংয়ের সময় দেয়া সারচার্জের সমান।

২) ৪.৫৪ কেজি লোড দিয়ে পেনিট্রেশন পিস্টনকে সেট করে পেনিট্রেশন ডায়াল ইন্ডিকেটর ও লোড ইন্ডিকেটরকে জিরো করে নিতে হবে।

৩) এরপর পেনিট্রেশন পিস্টনে এমন ভাবে লোড দিতে হবে যেন, পেনিট্রেশন রেট হয় ১.২৭ মিলিমিটার প্রতি মিনিটে। এরপর ০.৬৪ মিলি., ১.২৭ মিলি., ১.৯১ মিলি., ২.৫৪ মিলি., ৩.১৮ মিলি., ৩.৮১ মিলি., ৪.৪৫ মিলি., ৫.০৮ মিলি., ৫.৭২ মিলি., ৬.৩৫ মিলি., ৬.৯৯ মিলি., ৭.৬২মিলি., ১০.১৬ মিলি. এবং ১২.৭০ মিলিমিটার পেনিট্রেশনের সাথে সাথে লোড রিডিং নিতে হবে । 

৪) টেস্টের শেষে নমুনার উপরের ২৫ মিলিমিটারের অংশের ময়েশ্চার কনটেন্ট বের করতে হবে।    

ড্রাই ডেনসিটি ক্যালকুলেশনঃ

১) নমুনার  আয়তন নির্ণয় (V):
  
V= (π÷4)× [(D×D×H)÷(1000*1000*1000)]

এখানে, V=নমুনার আয়তন
D= গড় ব্যাস
H= গড় গভীরতা 

২) ওয়েট ডেনসিটি ( গামা) নির্ণয়ঃ
 
গামা ওয়েট=  নমুনার কম্প্যাক ভর/ আয়তন

৩) ময়েশ্চার কনটেন্ট নির্ণয়ঃঃ

m=[(A-B)/(B-C)]×100

এখানে,
m= ময়েশ্চার কনটেন্ট 
A= ময়েশ্চার কন্টেনার ও ভেজা মাটির ভর 
B= ময়েশ্চার কন্টেনার ও ওভেনে শুকানো মাটির ভর
C= ময়েশ্চার কন্টেনারের ভর

৪) ড্রাই ডেনসিটি নির্ণয়ঃ

ফিল্ড ড্রাই ডেনসিট,  গামা  =  (গামা ওয়েট)/[( ১+ m/১০০)]
 এখানে, m= ময়েশ্চার কনটেন্ট 


সিবিআর নির্ণয়ঃ

 
 প্রযুক্ত লোড P = R*K
এখানে R= প্রোভিং রিংয়ে রিডিং
K= প্রোভিং রিংয়ের ক্যালিব্রেশন ফ্যাক্টর

পেনিট্রেশন স্ট্রেস= লোড/ CBP পেনিট্রেশন প্লানজারের ক্ষেত্রফল

এই মানদ্বয় গ্রাফে বসিয়ে সিবিআর নির্ণয় করা হয়। 
   
  নরমালি ২.৫৪ মিলি পেনিট্রেশনের জন্য প্রাপ্ত সিবিআর এর মান ৫.০৮ মিলির জন্য প্রাপ্ত মানের চেয়ে বড় হবে আর যদি ৫.০৮ মিলির জন্য প্রাপ্ত মান বেশি হয় তাহলে আবারও টেস্ট করতে হবে।      


ভালো ইট চেনার উপায়


কনস্ট্রাকশন কাজের জন্য ভালো ইট চেনা খুবই জরুরি। এখন চোখে দেখে চেনার পাশাপাশি কিছু ফিল্ড টেস্টও জানা দরকার, যেগুলো যেকোন সাধারণ মানুষও খুব সহজে করতে পারবে ল্যাব পর্যন্ত যাওয়ার প্রয়োজন পড়বে না। 

ইটের ফিল্ড টেস্টগুলো হচ্ছেঃ

১) একটুকরা ইট নিয়ে এর উপর একটি পেরেক নিয়ে হালকা করে আঁচড় কাটার চেষ্টা করি। ভালো ইটে দাগ পড়বে না আর খারাপ ইটে সহজেই দাগ তৈরি হবে।

২) একটুকরা ইট হাতে নিয়ে একে হাতুড় দিয়ে হালকা আঘাত করি অথবা দুই টুকরা ইট হাতে নিয়ে পরষ্পরকে আঘাত করি। ইট ভাল হলে এখানে সুন্দর মেটালিক সাউন্ড হবে। 
    

৩) প্রথমেে দুই টুকরো ইট নিয়ে একটির উপর আরেকটি নিয়ে  T-আকারের সেইপ তৈরি করি। তারপর একে 1.2-1.5 মিটার উচ্চতায় নিয়ে ফেলে দিলে ভালো ইট ভাঙবে না আর ইট ভালো না হলে ভেঙে যাবে।    

এই প্রক্রিয়া অনুসরণ করে সহজেই যেকেউ ভালো/ মন্দ ইট আলাদা করতে পারবে ।

Loss Angeles Abration Test (এল এ টেষ্ট)

Los Angeles Abration Test : নির্মাণ ক্ষেত্রে ব্যবহৃত  aggregate এর toughness ও abrasion characteristics জানার জন্য এই টেষ্ট করা হয়।

প্রয়োজনীয় যন্ত্রপাতিঃ-    

১) Los Angeles abration machine
২) কাষ্ট আয়রন/ ষ্টীল বল - ৪৮ মিমি ডায়ামিটার ও ৩৯০-৪৪৫ গ্রাম ভরের ৬-১২ টি বল।
৩) sieve- ১.৭০ মিমি., ২.৩৬ মি মি, ৪.৭৫ মিমি, ৬.৩ মিমি, ১০ মিমি, ১২.৫ মিমি, ২০ মিমি, ২৫ মিমি, ৪০ মিমি,  ৫০মিমি, ৬৩মিম, ৮০ মিমি
৪) ব্যালান্স
৫) ওভেন
৬) ট্রে ইত্যাদি।


কার্যপদ্ধতিঃ
১) ওভেন ড্রায়েড (১০৫-১১০ ডিগ্রী সেলসিয়াস তাপমাত্রা)  স্যাম্পল A, B, C ও D গ্রেডের জন্য ৫ কেজি এবং E, F ও G এর জন্য ১০ কেজি নিতে হবে নিচের টেবিল অনুযায়ী-

  
২) এবার নিচের টেবিল অনুযায়ী বল মেশিনে নিতে হবে-

 গ্রেড বল সংখ্যা  বলের ভর
 A

 ১২ ৫০০০(+/-)২৫
 B ১১ ৪৫৮৪(+/-)২৫
 C ০৮ ৩৩৩০(+/-)২৫
 D ০৬ ২৫০০(+/-)২৫
 E ১২ ৫০০০(+/-)২৫
 F ১২ ৫০০০(+/-)২৫
 G ১২ ৫০০০(+/-)২৫

৩)  নির্ধারিত ভরের স্যাম্পল ও বল মেশিনের সিলিন্ডারে নিয়ে তার মুখ বন্ধ করতে হবে এবং মেশিনটিকে সুইচ অন করে ৩০-৩৩ ঘূর্ণন প্রতি মিনিট গতিতে ঘুরাতে হবে। A, B, C ও D গ্রেডের স্যাম্পলের জন্য ৫০০ বার এবং E, F ও G গ্রেডের জন্য ১০০০ বার ঘুরাতে হবে।

৪) এরপর মেশিনটি বন্ধ করে সিলিন্ডারের মুখ খুলে বলসহ স্যাম্পলগুলো একটি ট্রে তে ঢেলে নিতে হবে।     

৫) তারপর বলগুলোকে আলাদা করে নিয়ে স্যাম্পলগুলো ১.৭ মি.মি. সিভ দিয়ে চেলে নিতে হবে।  

ক্যালকুলেশনঃ 

ধরি,
    A= ওভেন ড্রায়েড স্যাম্পলের ওজন
    B= ১.৭০ মি.মি. সিভের উপরে থাকা স্যাম্পলের ওজন

    তাহলে, স্যাম্পলের এলএ (LA VALUE) ভ্যালু  = ( (A-B)/A)*100


Hi
How Are You????
We will discuss about civil engineering here....

Lapping in Reinforcement

Lapping in Reinforcement L apping in Reinforcement:  Lapping length of reinforcement is one of the important term in RCC. It is a very confu...